Wednesday, February 29, 2012

Comfort food from Dad's garden. (Zucchini patties)

When  I was a kid, every spring Dad planted a garden.  We had fresh vegetables all summer long and little did we know we were eating "fresh, sustainable and organic produce".  Now we pay an arm and a leg for that very privilege.  Corn, asparagus, tomatoes (oh how I loved eating them right off the vine just as I would an apple!), watermelon, peppers, onions to name a few.

Dad always grew zucchini and Mom knew just what to do with the abundance.  My favorite zucchini dish was and still is zucchini patties.  Simple ingredients thrown together with an addicting result.  It's my idea of comfort food. 

Here's all you need to get started:
Zucchini, eggs,  flour, onion, cheese, and some oil for cooking.


If zucchini patties aren't something you've eaten before, give these a try.  Once you've had them, you'll make them 10 more times!


Now for the prep do the following:

Grate 2 cups of zucchini
Grate 1 cup sharp cheddar
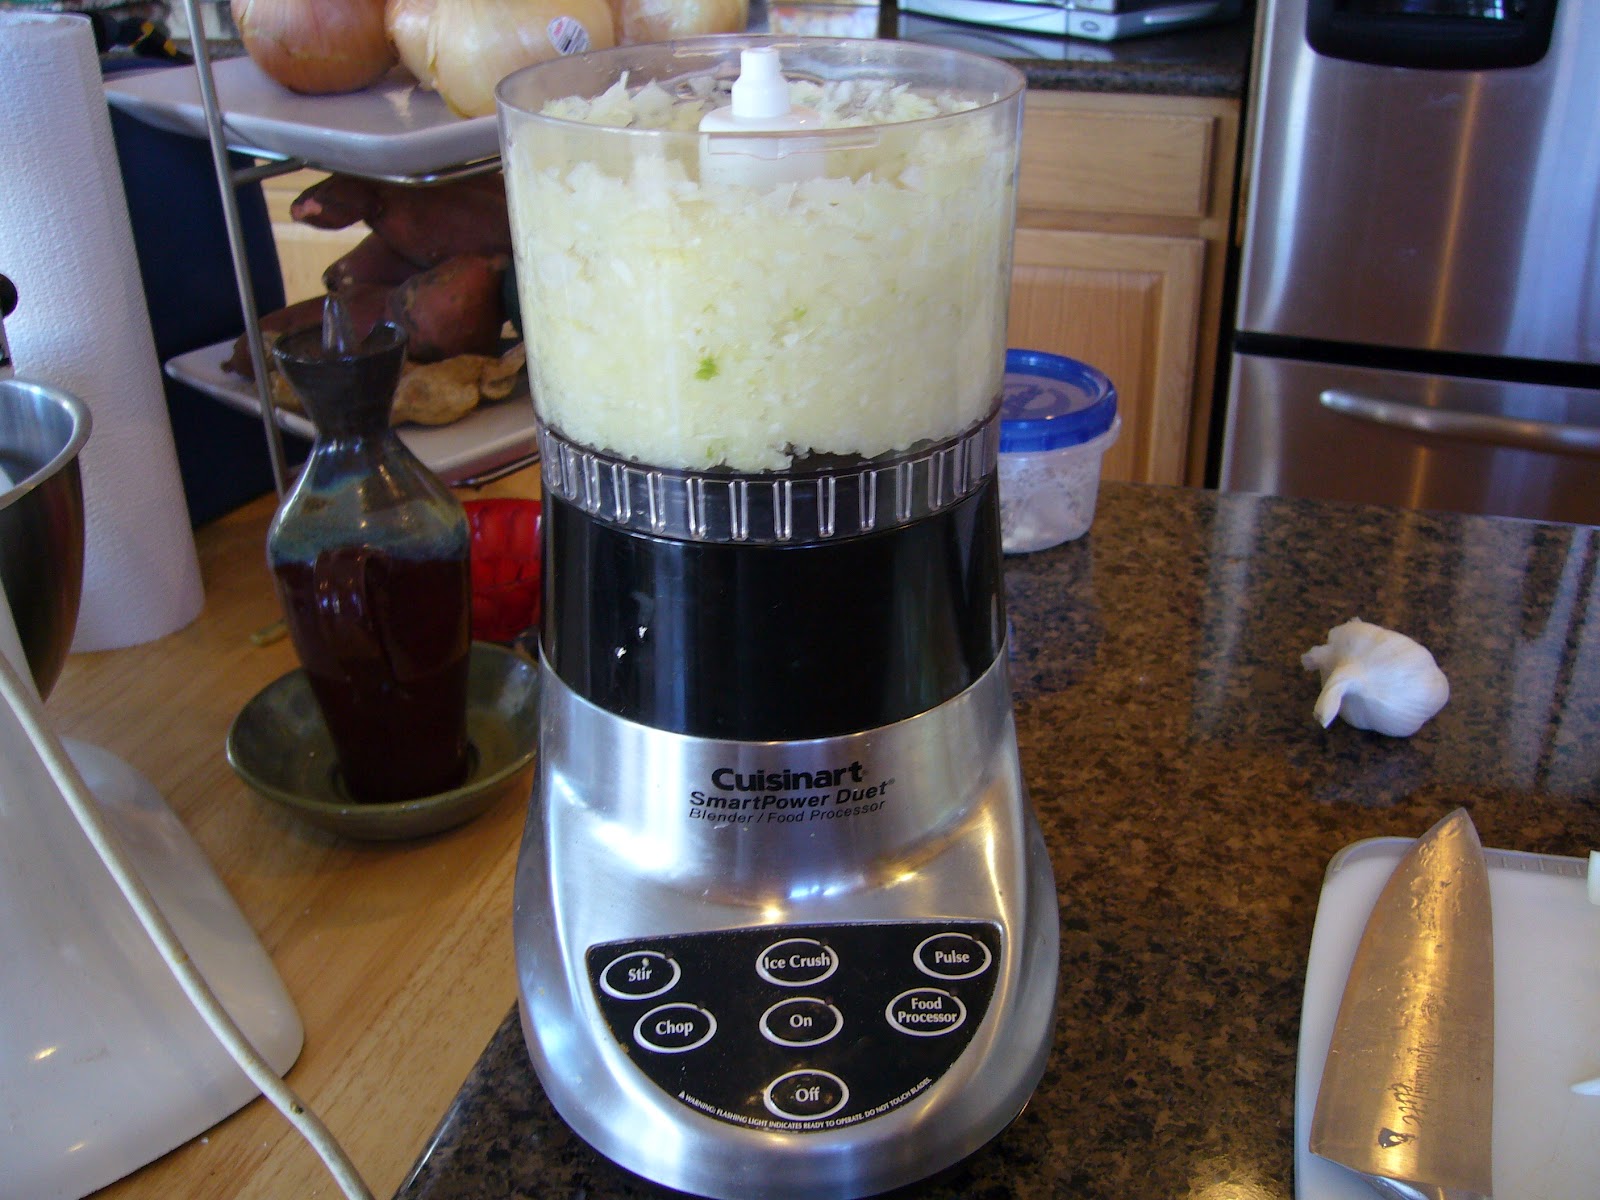
Mince 1/4 cup of onion,
Slightly beat 2 eggs
1/4 cup flour

When this is ready, you are ready to put it all together. 

It's so quick and easy  you'll have time to sneak in an episode of "I love Lucy" reruns!

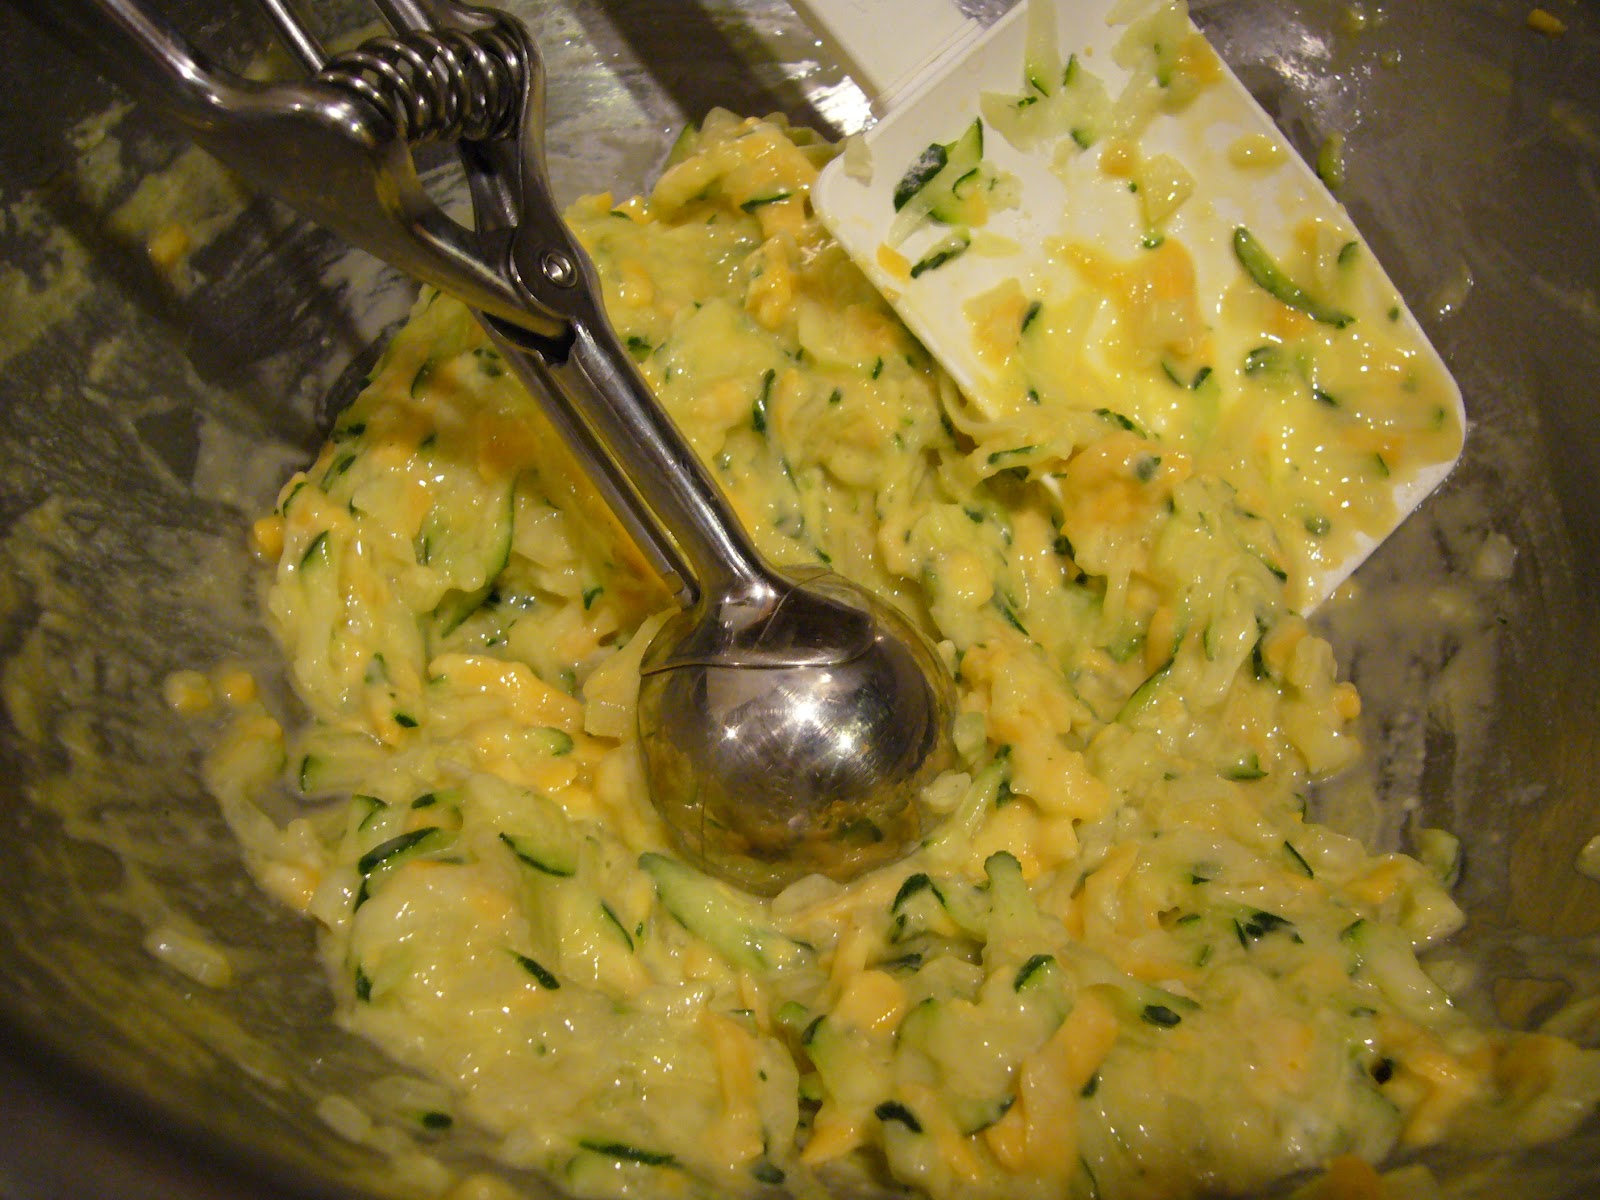
Toss together the zucchini, onions and cheese until well blended.  Sprinkle the flower in and mix thoroughly.  It should look like this when you're done, kind of dry and tacky.  I've tried throwing everything together all at once and it works, however this order just works better.  The coating mixing is even and easier to handle.


When the mix is fully incorporated then stir in the egg until it's nice and moist again.  It will have the consistency of thick pancake batter.


I use a 2 Tablespoon cookie scoop to get this ooey gooey goodness into the pan in even batches. The cookie scoops are from Pampered Chef.  I've had mine for years.  They come in three sizes:  2 Tbsp, 1 Tbsp & 1 tsp.  If you'd like to get one or more for yourself you can order them from my website.  Due to contractual restrictions I cannot post a link to my website so simply eliminate the spaces when you plug it in your browser.  Here it is:  Pamperedchef.biz/ameliaautrey


See how they are mounded in the shape of the scoop?  I use the back of the same scoop to flatten them out just a bit, (see below).


Look how nicely they flatten out.  Cook them on medium-high  heat, like you would a pancake.  You'll need just a touch of oil in the pan so they don't stick.  You can use vegetable or olive, it doesn't make a difference.  Once I have them in the pan like this, I sprinkle each with salt and pepper.  I find if I season them at this point instead of the entire mixture, I use less salt which is always a good thing.


When they are golden on one side, it's time to flip those babies.


Now to plate and serve!  They are excellent hot off the grill or cold.  Serve them as a side dish or as the main course.  The are more versatile than two sided underwear!


This recipe will net you 14 patties.  You can make them larger if you'd prefer.  For all you Lazy Lizzies out there, you can even put them in a bar pan and bake them at 375 for about 20 minutes.  Check them as the depth of your pan will make a difference in how long they take to cook.  The edge pieces are the best part, all nice and crispy!  You may need a cigarette when you're done eating.    The good thing is they are hard to over cook.   So give it a shot!


As always, I'm interested in your comments and more specifically your reviews after you've tried them!  Oh, oh, oh...and if you have a hankering for a little spice, toss some minced jalapeno into the mix for a little kick. 

Friday, February 24, 2012

Marinara Sauce to last!

Are you a Costco shopper?  Do you buy their jarred marinara?  I used to but now I make my own.  By doing so, I save $ and dare I say mine is better?  Don't misunderstand me, I love Costco and shop there regularly.  I just shop differently now.  I found I pay on average $3 for a 32oz jar of their Classico marinara sauce.  When I discovered they carry 106oz  cans of crushed tomatoes for $2.69 (the main ingredient in marinara) I wondered, how hard can it be to make my own batch? As a bonus you can buy everything you need at one time to make this while you're at Costco buying the crushed tomatoes.  How convenient is that?  Another option is to buy smaller quantities elsewhere.

This recipe calls for one of those 106 oz cans.  Have some for dinner and freeze the rest in zip lock bags.  You'll end up with six quart bags for future use.  They stack nicely and anytime you want marinara all you have to do is pull a bag out of the freezer and voila!  Dinner is halfway done!

Here's what you'll need:

1- 106oz can of crushed tomatoes
4-6 oz cans tomato paste
1 cup dried parsley
4 garlic cloves
2 Tablespoons dried oregano
2 Tablespoons salt
1 teaspoon pepper
1/3-1/4 cup olive oil
1 1/2 cups onion
1 3/4 cup white wine

Open up all of the cans.  In a small bowl combine the dried herbs.  Peel the garlic and get ready to make some marinara!


Heat the oil in a large pot.


While it's heating, peel one large onion.  Give it a rough chop so it will fit in your food processor.  You can hand chop everything, but why?  Pulse it  until the onion is diced but stop before it becomes mush.  One large onion should net you 1 1/2 cups, minced.  Don't fret if it's a up to a half cup over, that is not a problem.


When the oil is hot, stir in the onion and saute it for about five minutes or until it's translucent.
 
While the onion is sauteing (stir it occasionally so it doesn't burn) put 2 cans of the tomato paste, the dried herbs, salt & pepper and garlic into the processor.  Mix it up good!

If you plan this right, you should be done with the mixing when the onions are sauteed.  Add the mixture along with the other two cans of paste to the sauteed onions.  Stir it all together so the garlic cooks and the onions are incorporated into the tomato paste mixture. 

We like a little bit of spice in our food so I add about a palm's worth of crushed red pepper flakes.  The sauce will definitely have a kick to it but you can leave it out if you don't like heat.

Let it simmer for 30-50 minutes and it's ready!  I use an immersion blender to make it super smooth and creamy.  You can also use a blender or food processor, but only in small batches.  You don't have to do this at all, it will still be just as good, only slightly chunkier.  When it's done, let it cool.  Package it into zip locks bags and stack those puppies in the freezer.  Next time you want some pasta, you're ready! 

Oh, you can also buy the cans of tomato paste by the case at Costco too.  My last trip there I purchased 4 of the 106 oz cans of crushed tomatoes, a case of tomato paste, a large container of dried parsley, salt, peppercorns (I grind my own pepper) and oregano.  Depending on which state you live in, you can buy your wine there too!

The most important thing is:  Make your cooking count!  In this particular case you dedicate 1 hour to cooking, which includes the prep, and you have your sauce for tonight's dinner and six more!  Think about it, only an hour, better tasting marinara and a boatload of savings.  Oh and don't forget the bragging rights when you serve it up!  It doesn't get much better than that!!  Now these are ready for the freezer.

So start cooking and enjoy!


As always, your comments are appreciated and your results after trying the recipe are appreciated even more!


Collard Greens & Yam Salad


I'm on a quest to eat a healthier more vegetarian diet.  Yes, I still eat meat and dairy but a whole lot less of it.  My focus is on more of a plant based diet.  On my new culinary journey I found a recipe submitted by some guy named Matt on a community website.  It called for kale and sounded easy.  The reviews were good and I had the necessary ingredients on hand, except for the kale.  I did have collard greens though!   So I changed up a thing or two and here's the final result.

Here's what you'll need:

2 yams                                                  olive oil                                     1/8 cup toasted pine nuts
salt & pepper                                        1 onion, thinly sliced
3 cloves garlic, minced                        1 bunch of collard greens
2 Tbsp red wine vinegar                      2 oz goat cheese


Wash and the yams and dry them well.  Cube them, toss them in the oil, about a tablespoon with some salt and pepper.  Roast them at 400 for about 25 minutes or until tender.   Set them aside and let them cool completely.  This can be done in advance.


While the yams are roasting, slice the onion thinly.  Put another tablespoon in a large pan on medium heat and cook the onions until they are brown and caramelized.  When they are almost done add the garlic so it can cook and caramelize too. 


While the onions are doing their thing, trim the collard greens and hand tear them into bite sized pieces.

If your  not familiar with collard greens this is what they look like in raw form.  I didn't grow up eating them but find I do like them!   The have a hard stem which I simply cut out and discard.


Add the collard greens to the onion and garlic once you have that nice golden color on the onions.  Cook the greens until they have wilted.


Put this mixture in another container so it can cool completely.

At this point you should have the cooled roasted yams ready to go along with the cooled greens with onions with garlic.


Again while the greens are cooling you can toast the pine nuts.  Simply put them in a dry pan on medium heat and toss occasionally.  Stay close!  They'll only take about five minutes to toast.   You'll smell their fragrant aroma when they are ready and you'll find they are lightly toasted on the bottom.  Go ahead and remove them from the heat.


When everything is cool mix the cubed yams and collard mixture together and toss with the vinegar.  Sprinkled on the cheese and nuts.  You now have a colorful, healthful and delicious gourmet salad.  Sprinkle some goat cheese on top and dinner is ready!


Plate this beauty alreay! 

Using a white plate will make the vibrant colors POP!  See what I mean?  Toss on the pine nuts and a little goat cheese and dig in!


 As an extra bonus, this same recipe can be used with kale in place of the collard greens.  Go ahead try them both ways.  You have nothing to lose and good health to gain!

As always, your comments and individual results are most welcome!

Thursday, February 23, 2012

Loaded Oatmeal Cookie Treats


Several years ago my Mother-in-Law, Kay bought a new Kitchen-Aid mixer and gave me her old one.  I was so excited to get it.  We're talking about an old mixer that's concocted more cakes, cookies and breads than you or I will ever make in a lifetime.  This puppy has been worked to the point of exhaustion, broken down and repaired for another go round.  I only wish I knew how old it was so I could brag about it more.  When in the locked position it sometimes still "jumps" but I don't care.  To me it's akin to a Dad passing along his treasured tools to his son.  It always held a place of honor in Kay's kitchen and now it's in mine.  It's a work horse to be sure, but to me, it's a beauty!  Having said that, let's put it to work on something sinfully delicious.

Everyone's eaten an oatmeal cookie at some point.  It's the cookie you can almost say is good for you.   I wouldn't say these are "bad" for you, after all they do have oatmeal in them and cause my husband to do his happy dance when he learns I'm making some.

The ingredients are simple ones that you're likely to already have on hand.

1 cup butter, softened                                                    1 cup brown sugar, packed
1/2 cup sugar                                                                 2 eggs
1 tsp vanilla                                                                   1 1/2 cups flour
1 tsp baking soda                                                           1 tsp cinnamon
1/2 tsp salt                                                                      3 cups old fashioned oats
1/2 cup craisins                                                              1/2 cup chopped walnuts
1/2 cup chocolate chips

Get all your ingredients together.  As shown, I use a few bowls to make the process easier.  In my main mixing bowl I put the butter and sugars, in another bowl I combine the egg and vanilla, in yet another the salt, soda, cinnamon and flour, then lastly one with the all the goodies,  nuts, chips and craisins.  


Cream the butter and sugar together.  Incorporate the egg and vanilla  until well blended.  Carefully mix in the flour mixture (if you do it too fast you'll be wearing the flour).  The oats go in next followed by the bowl of goodies.


When you're done mixing, you'll have few things to wash.

At this point you can put cookies on several sheets or do as I did, line a bar pan with parchment paper.  You can use PAM instead but the parchment paper will make removing the cookie bars super easy.


Pour the mixture onto the paper in the bar pan.  It will be very thick.  Spread it as evenly as you can.


It will look like brown confetti in the bar pan.
Bake at 350 for 30 minutes.  If you're using stoneware, check them sooner as they'll cook faster.  They should still be slightly soft.  It's easy to over bake them so be careful.  If you do, don't panic it's nothing a tall glass of milk can't make better!


Pull those puppies out of the oven and let them cool before removing them from the pan.  If you didn't use parchment you can cut them in the pan then scoop them out.

This type of cut makes them easier to store.  I make a big batch and freeze the majority of them so my husband thinks I'm "a good wife" because I add homemade cookies to his lunch. Who doesn't like a sweet treat surprise in the middle of the day?


Add milk, hot chocolate or a chocolate liqueur and magically you're day will be infinitely better!


Wednesday, February 22, 2012

Split Pea Soup for beginners

I grew up as one of six children.  Of those six kids only my brother and I really loved split pea soup.  So whenever Mom made it, we knew she was making something we especially liked.   If you've ever heard the old bit about a dish being made with love, it's so true!  Regardless of how easy or hard it is to make, love is the most important and abundant ingredient.  Cooking for someone takes time and when you put forth effort for someone else, you are giving them your love.  So when Mom made split pea soup I felt the the love. 

When it comes to split pea soup, you either love it or you hate it.  It's no secret, I love it!  And contrary to the beliefs of some (you know who you are) you don't have to split the peas yourself!  They already come split.  Four simple ingredients and you're on your way.

I normally put ham in my soup, however in honor of my vegetarian friends out there, this one is a vegan version.  Thanks to my friend Daisy for leaving the bouillon at my house for me to "play with" and to Brenda M., both from Virginia who are vegetarians and encourage me in that direction.  For my fellow carnivores out there, you can use chicken stock in place of the vegetable stock if you'd like.  Also adding diced ham makes it a bit more hardy.

If you have a ham bone, stick it in the water as the soup cooks.  It will add an amazing dept of flavor.  Then you can take the remaining ham bits and add them to the soup.

 Here's all you'll need:
4 quart crock pot
4 cups split peas
1 carrot, diced = 3/4 cup approx
1 cup diced onion
3 cubes of vegetable bouillon
3 quarts water

Those little peas are going to swell in size so it will look like you have too much liquid to start.  If at anytime the peas rise above the liquid line, add more so they are covered.

If you don't have a crock pot you can use a stove top pot with a lid and cook on it very low heat.  I would encourage you to get a crock pot.  I've had one (not the same one) since I was first married back in the early 80's!  Actually I have two of them now, a 6 quart and a 4 quart.  Don't tell my husband but if I see a 2 quart, I'll buy it!  Crock pots are like pots and pans.  You need different sizes for different dishes and/or crowd size.

If you're on a limited budget, the good news is they are inexpensive!  You only need someplace to store them.  Stop at your local thrift store and I'll bet you can find 3 or 4 of them for about $10 each.

As it nears completion the peas will appear intact, however when you stir them they will disintegrate and become a thick soup.
 
Fear not, if this seems like way to much soup for one night's dinner, it's supposed to be.  You can fill quart zip lock bags with enough portions to suit your household and freeze them.  They stack nicely and don't take up much room. 

What could be more comforting than coming home on a cold afternoon, tired, hungry and knowing all you have to do is pull a bag out of the freezer and heat it up?  Add crusty bread and you're set.  Serve it up as the main course or use a smaller serving and add a salad.  Either way you are going to feel all warm and fuzzy inside, I promise!